Remove image background using Photoshop in 12 simple steps

Crop out your picture to a transparent background
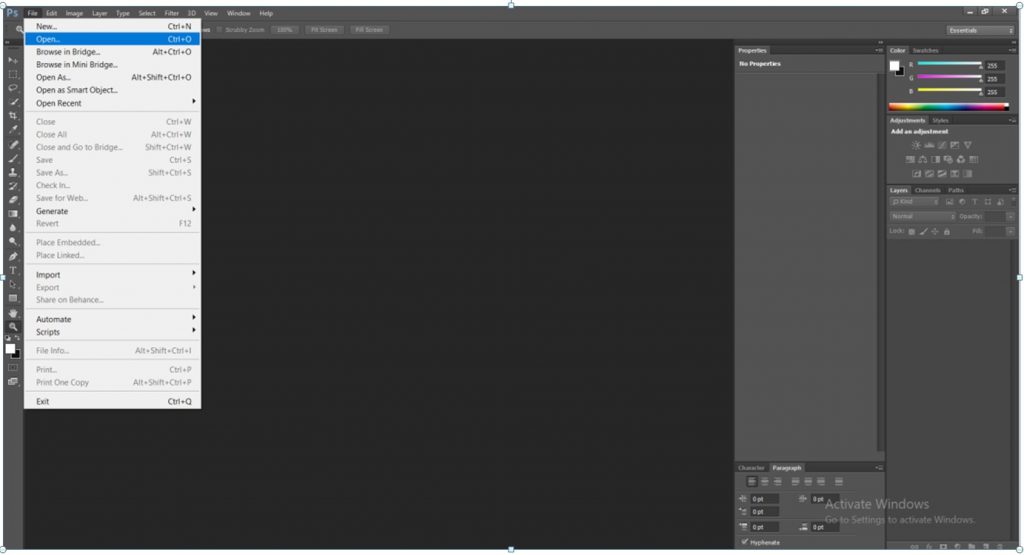
- Click on photoshop icon ‘Ps’. Go to File – Open
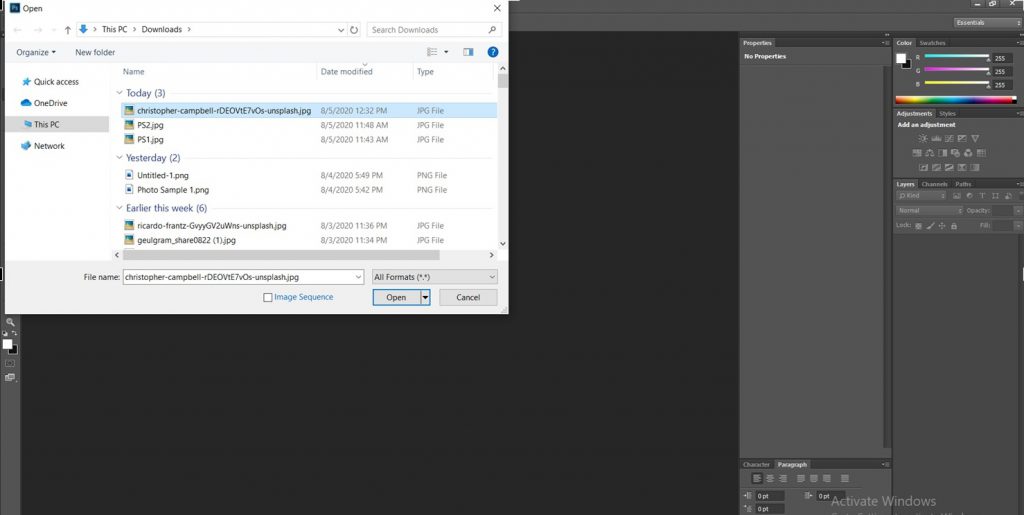
2. Once you click open, a list of all your files from your computer will appear. Select the folder and type the file name in the box (or search for the saved photo/file) as seen in Image 2.
3. The main aim here is :
- To remove the picture from the background by selection
- To use the selected part (picture) and paste it onto a transparent (image) background
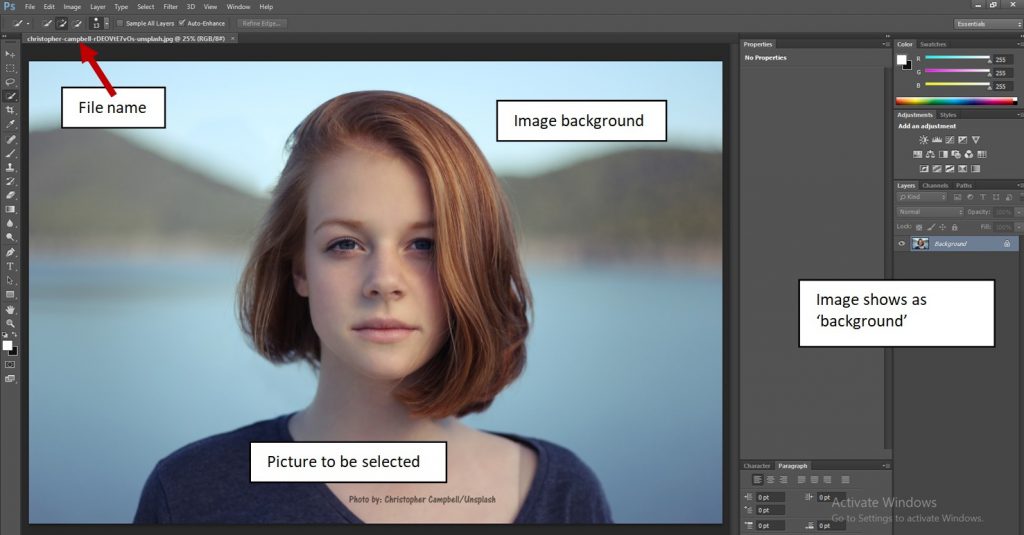
Note that after you select a file, it appears as shown in Image 3. Study the elements of Image 3 to understand what needs to be done in the following steps.
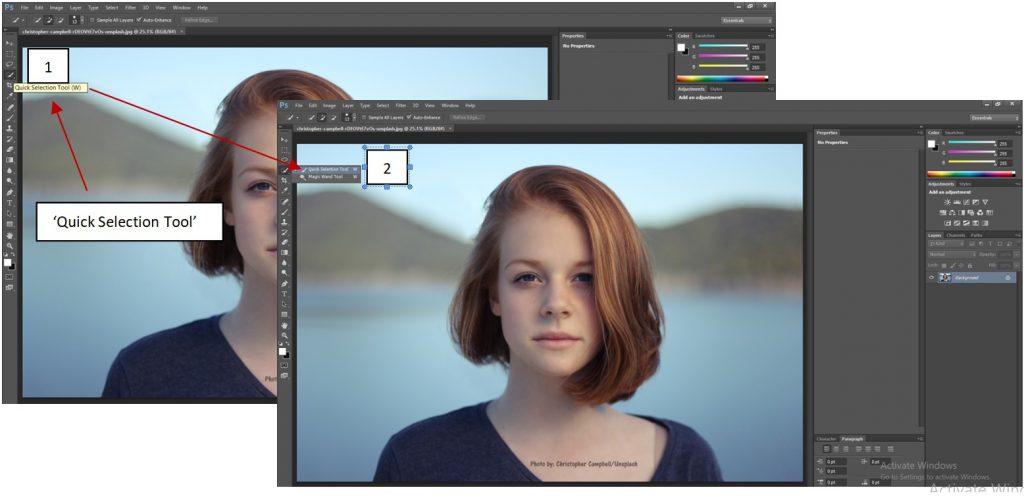
4. Find the ‘quick selection tool’ on the left menu bar. Hold onto the quick selection button and click the ‘quick selection option’ as shown in Image 4.
5. Select that part of the image that you want to transfer onto a transparent background by double-clicking on the image background. (Image 5) The quick selection option automatically detects the background differences from the image you are selecting.
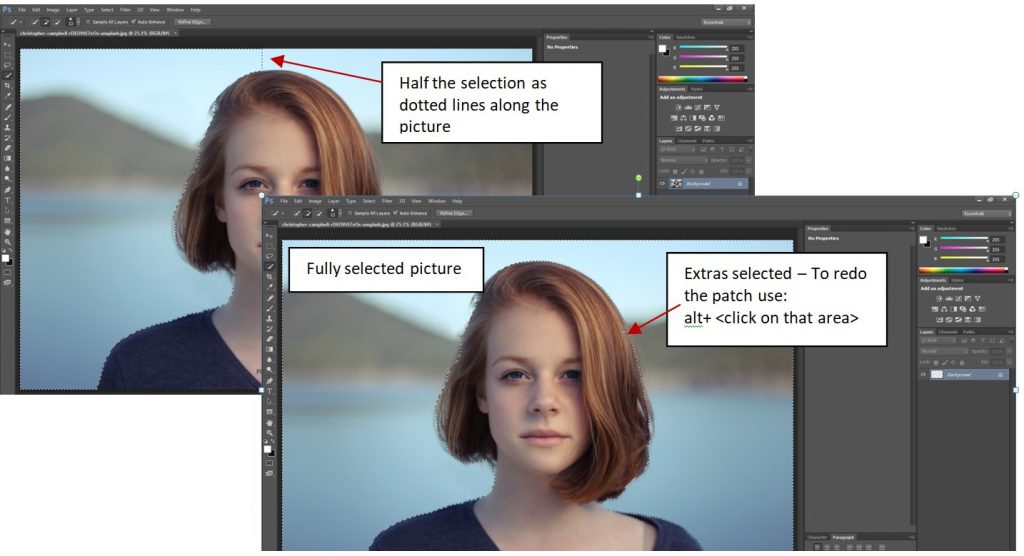
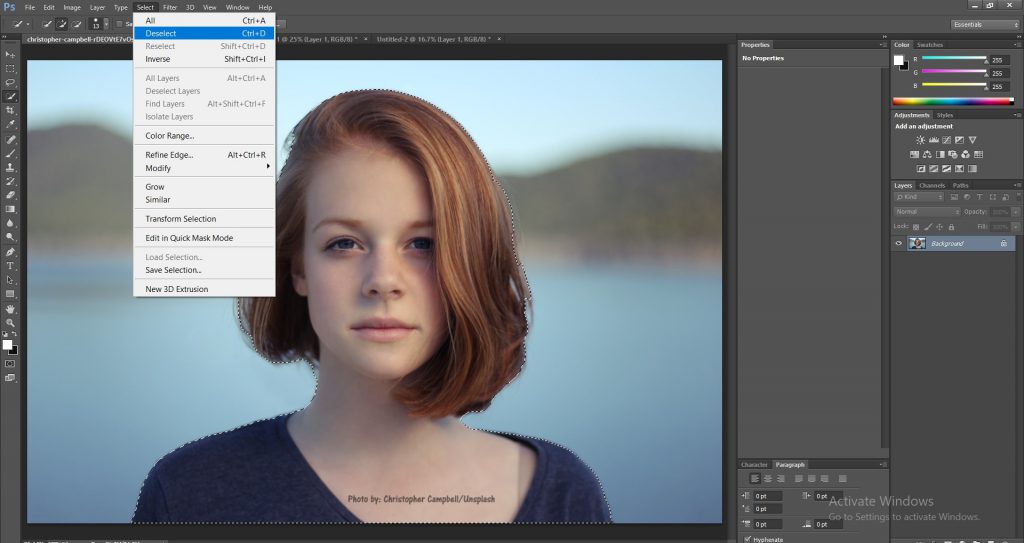
6. If you’ve accidentally selected a wrong patch on your picture, you can go back on your selection by clicking the alt (on your keyboard) while simultaneously clicking on the area you want to deselect to make the necessary changes. If you’d prefer to deselect the entire selection, go to the ‘Select’ on the top menu bar and click on ‘deselect’ as shown in Image 6. You can then begin reselection again. Note: After you have finally selected your picture, make sure you select all sections of the image to clear off any patches, dots or blotches. These would otherwise cause empty patches to be visible on your image in the final file.
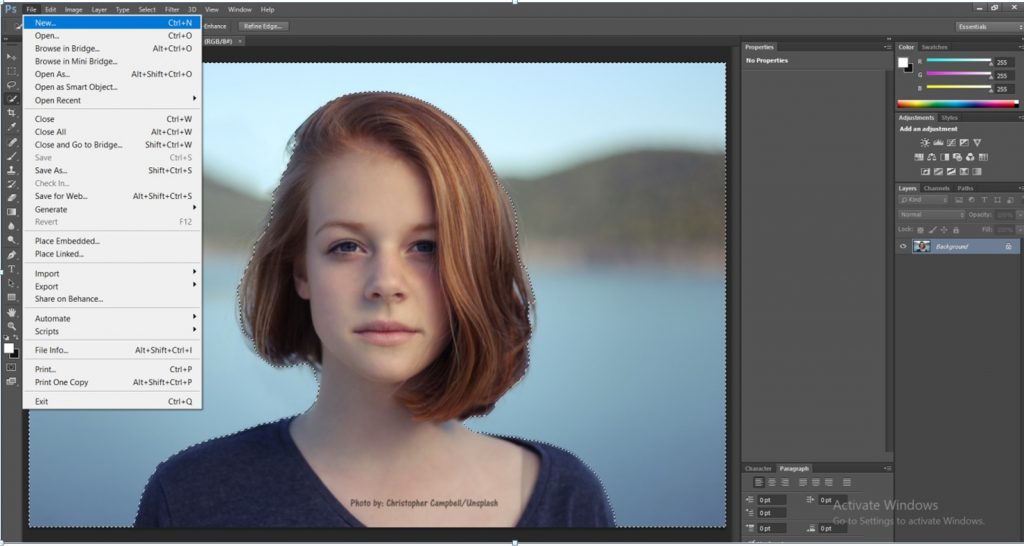
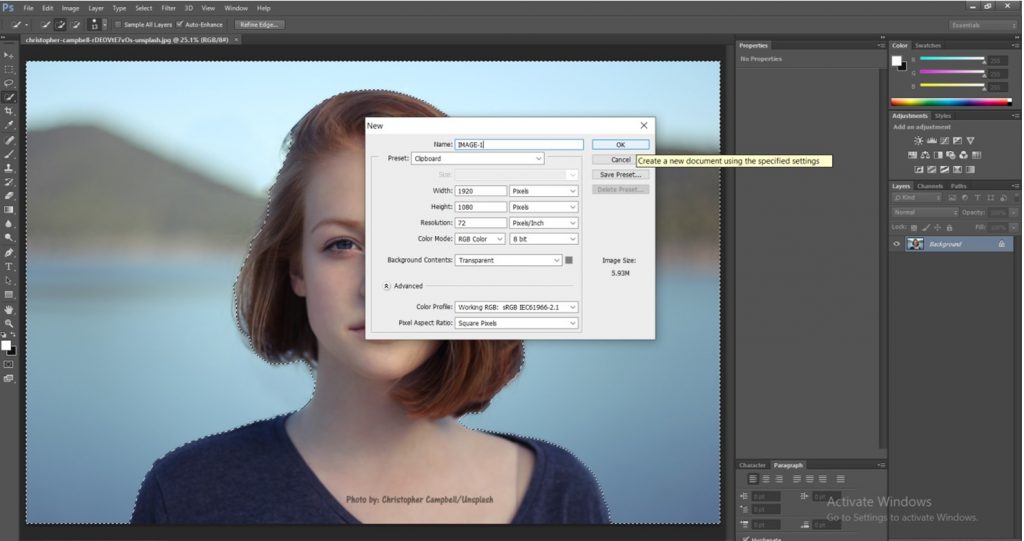
7. On the top menu click the ‘File’ then ‘new’ to open a new document to paste your inverse selection as shown in Image 7. Name the document as shown in Image 7.1. Adjust the width, height and resolution (default is 72) if required to increase/decrease the image background accordingly. Make sure the ‘Preset’ is set to ‘Clipboard’ and ‘Background contents’ set to ‘Transparent’. Click on ‘OK’ to open the new document. The new document with the given filename appears at the side of the current document as shown in Image 7.2. Note that the transparent background appears as a grey and white checkered box.
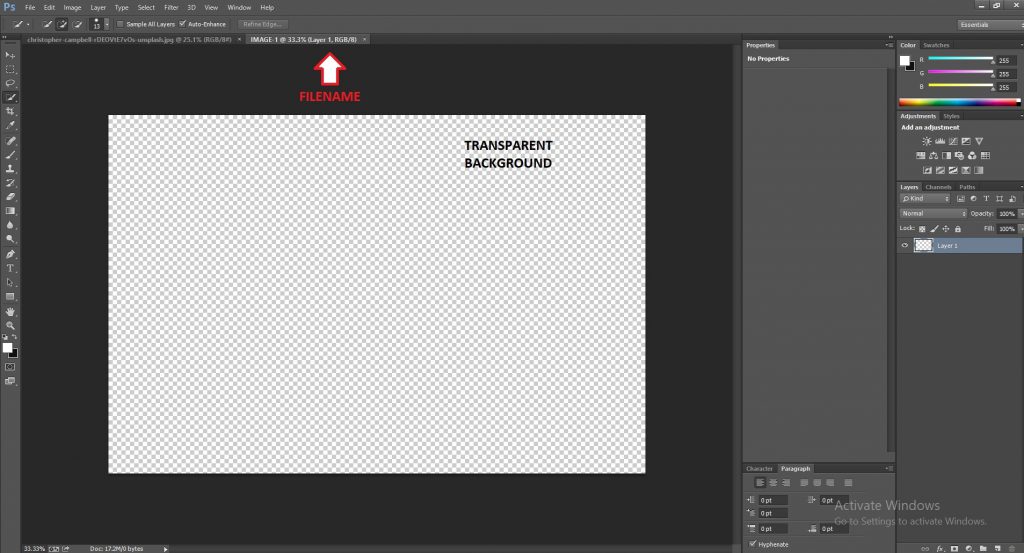
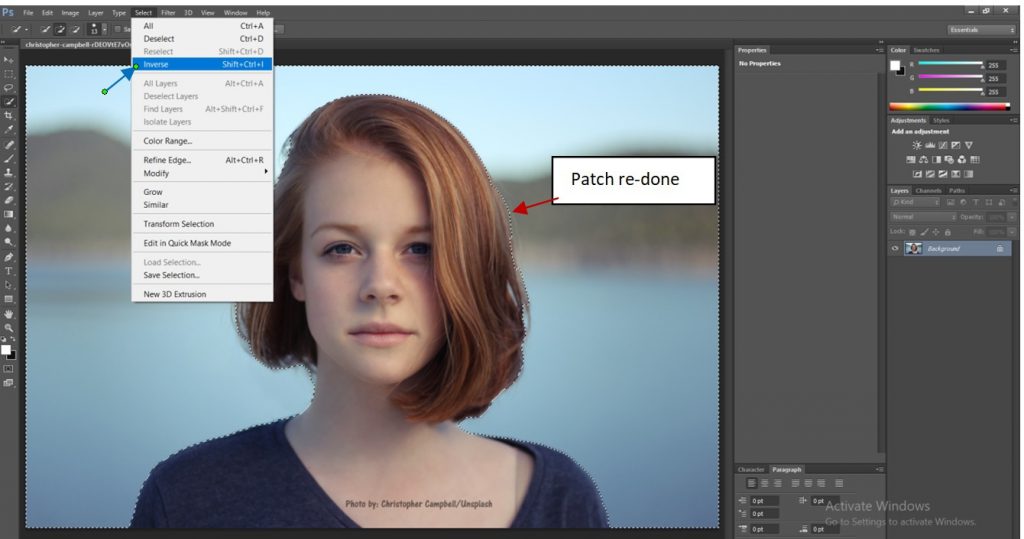
8. Now, go back to the main document with the selection. Click on the ‘Select’ tab at the menu at the top. Choose the ‘inverse’ option from the select tab as shown in Image 8.
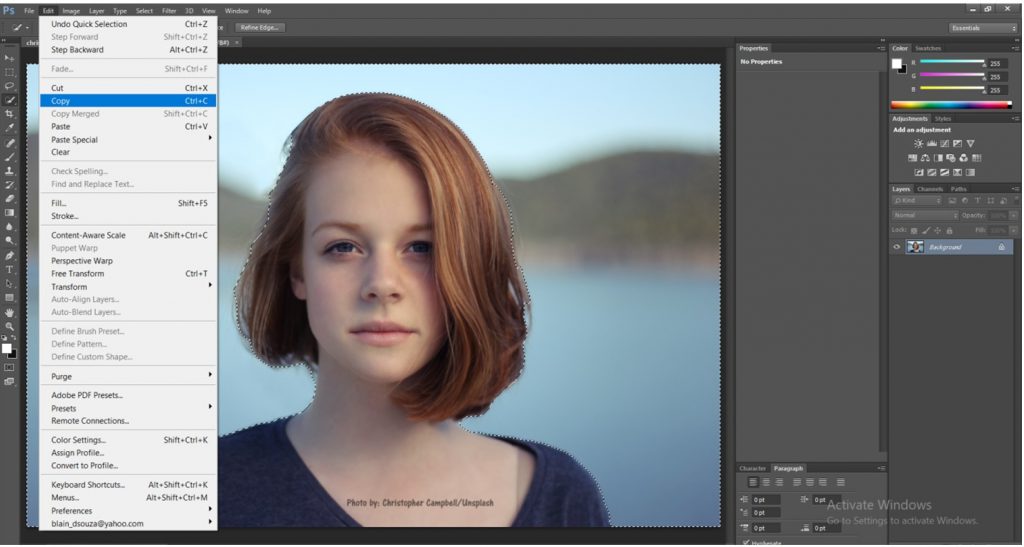
9. Next go to the ‘Edit’ tab and click ‘Copy’ as in Image 9.
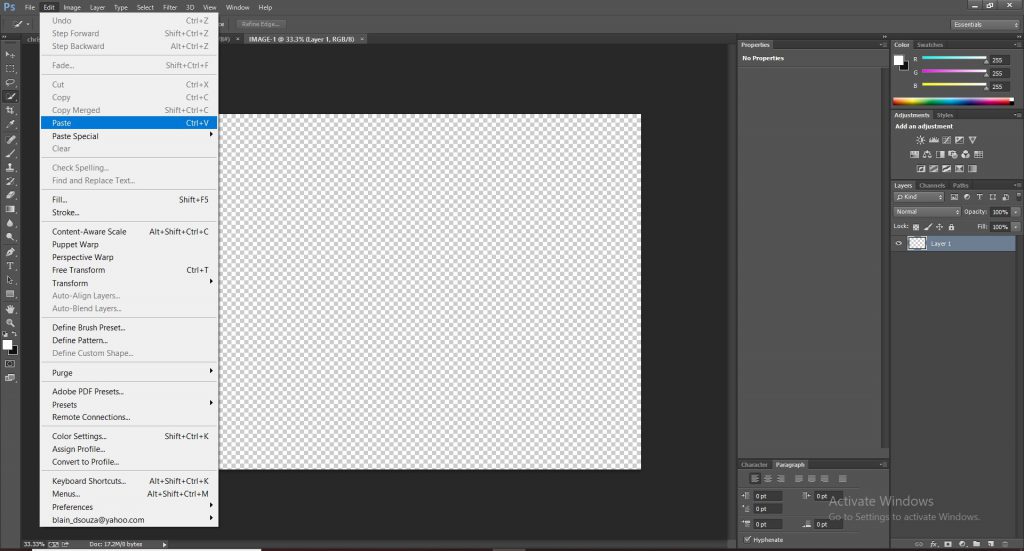
10. Go to the new document panel, click ‘Edit’ and ‘Paste’ as in Image 10. The selected picture gets pasted onto the transparent background in the new document. (Image 10.1)
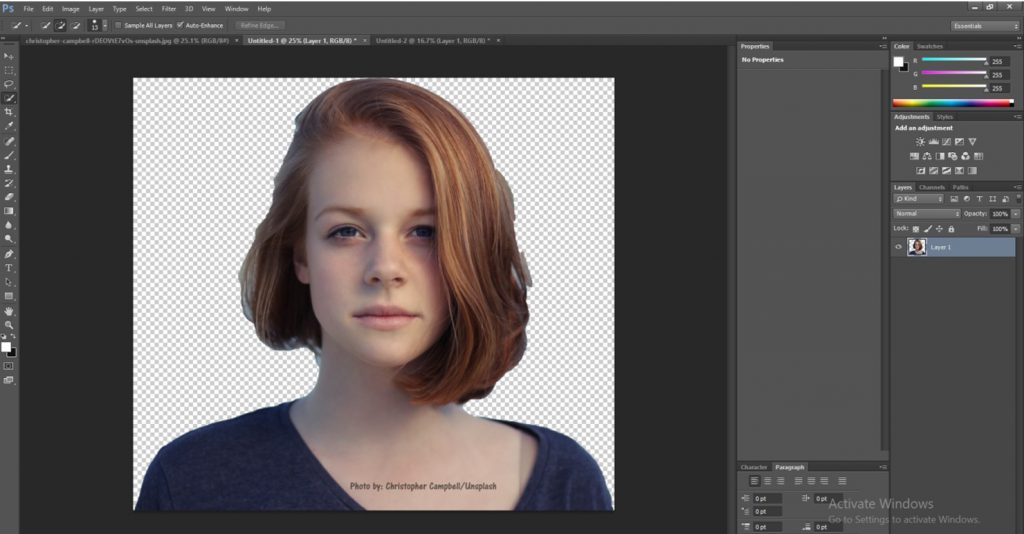
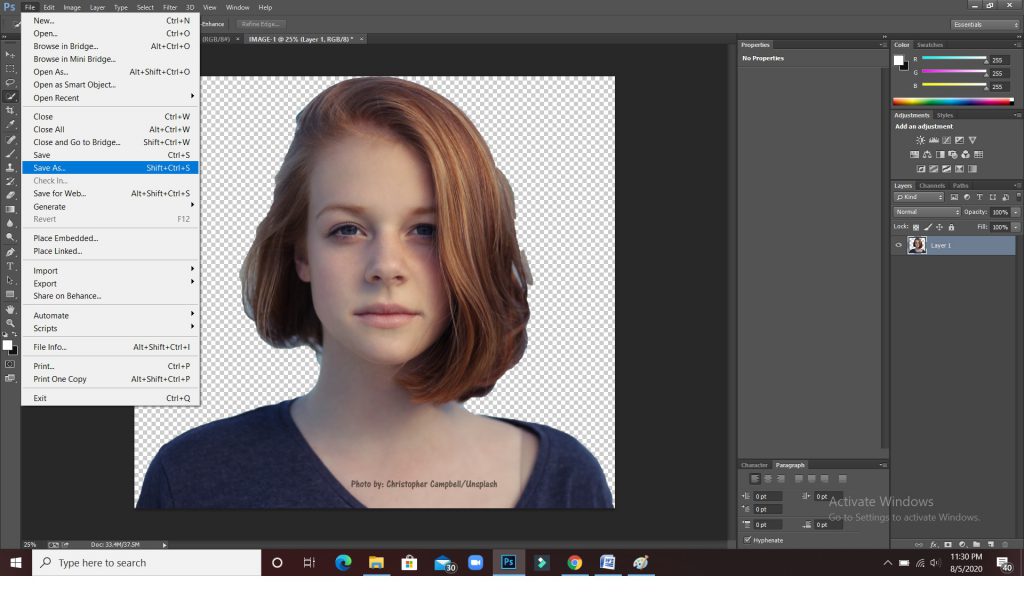
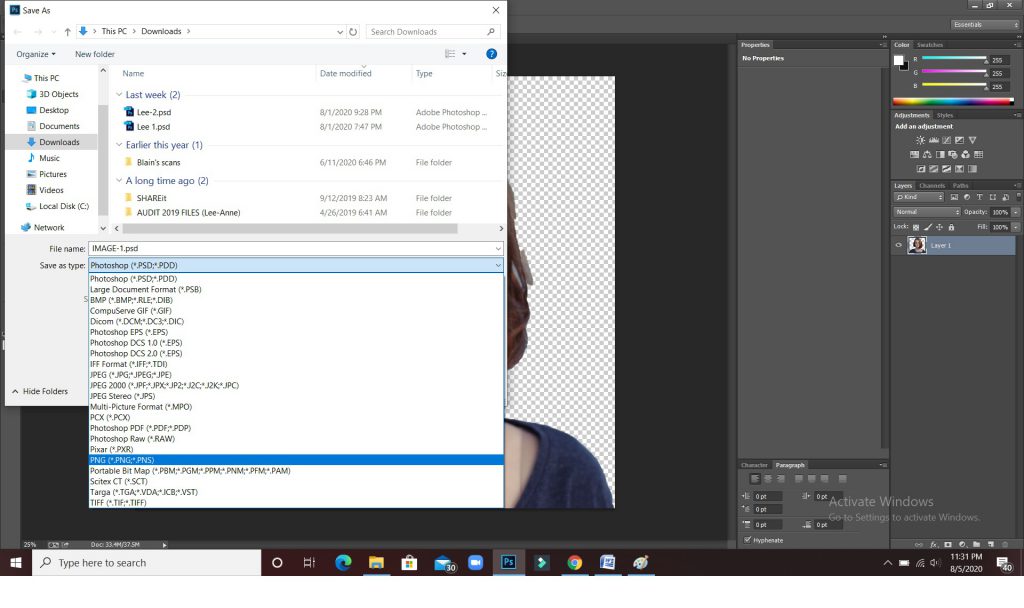
11. The last step is to save the file in ‘.png’ format. Go to the ‘File’ tab on the top menu, choose ‘Save As…’ Check the filename and choose to save as type ‘PNG’ (*.PNG; *.PNS*) as seen in Image 11.1. Proceed to SAVE and OK. (Image 11.2)
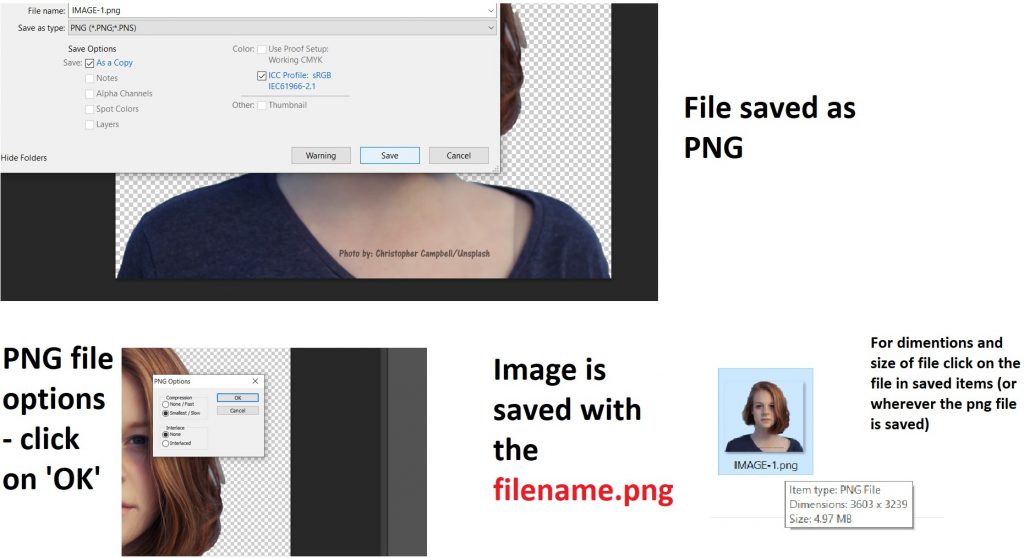
12. To retrieve your file find the folder where your file is saved. The final image appears against a transparent background. It blends with white screens/paper and is now ready to use!
And… here’s your cropped picture on a transparent background!

There are many more options to edit images, make them brighter, sharper etc. However, this tutorial was to understand cropping out the required selection to place it onto a transparent background. And here’s how simple it was!